Compare Prior Patient Images OptosAdvance
OptosAdvance will automatically compare the most recent studies and the first prior study by selecting the correct stage of the Hanging Protocols. A full help file can be found within your OptosAdvance instance.
Viewing prior studies
If there are prior studies for the patient, you can compare today’s images with the first prior image set side-by-side by doing one of the following:
- Clicking the Next button on the toolbar within OptosAdvance
- Pressing the next arrow on your keyboard
- Manually selecting the stage by clicking the Hanging Protocols icon and choosing stage
- Prior stage is marked by an asterisk (*)

Changing the prior image
If you want to change the image in a viewport to a different prior image, follow the steps below:
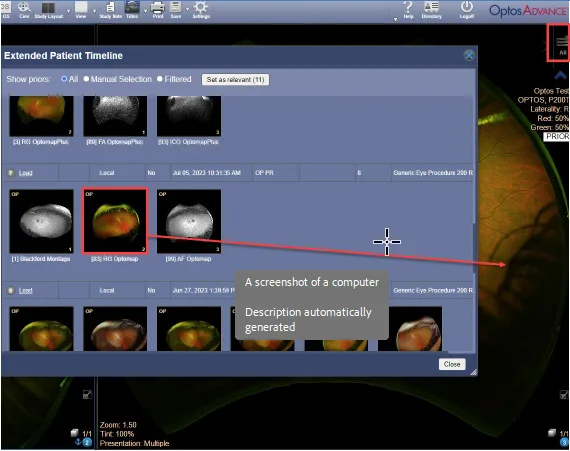
- Click on the All icon in the top right of the screen
- Drag, and drop the desired image from an alternate date of service into the desired viewport
Note: A timeline with all prior dates of service should also be visible at the top of your screen from which you may also drag and drop. Once you drag the date into the viewport, the left-hand series of image thumbnails reflect that date of service. Drag and drop the desired image into the viewport. Click on OD or OS from the toolbar to display correct image laterality.
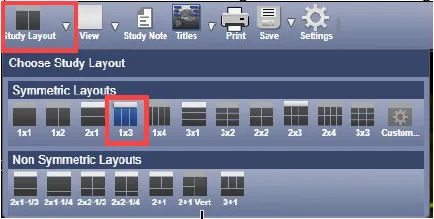
Comparing more than two visits
- Change the Study Layout on the toolbar to the number of images you want to view. Click on the arrow beside Study Layout to view the choices available. For example, if you would like to see three images on the screen, change the study layout to 1x3.
- Click the All icon at the top right of the screen to display the Extended Patient Timeline.
- Drag and drop any of the thumbnail images to one of the viewports
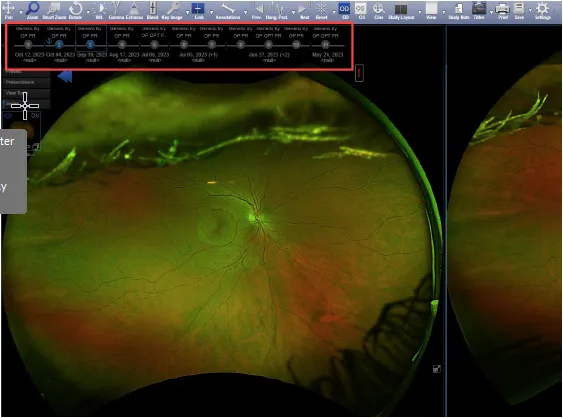
Making timeline visible
When prior studies exist, a timeline should appear in the upper-left corner, as shown below.
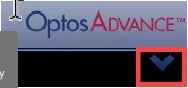
If the timeline does not appear, but prior images exist, it has been collapsed. Click the blue down arrow button in the upper right corner below the OptosAdvance logo.
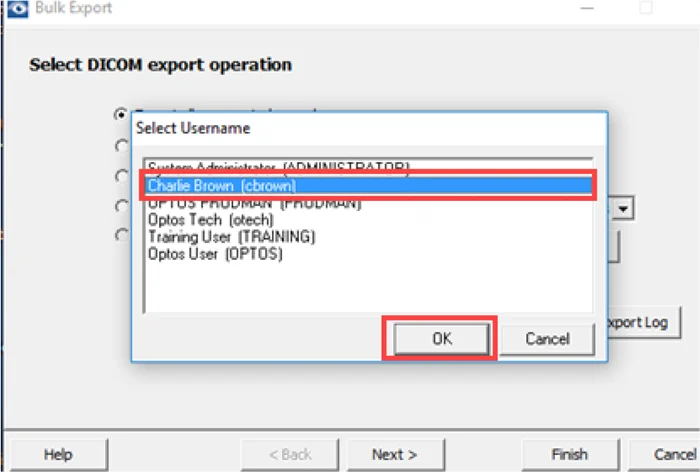
Exporting individual patient images
- Open Vantage Pro Bulk Export by double-clicking the icon.

- Select a Username from the list and click OK.
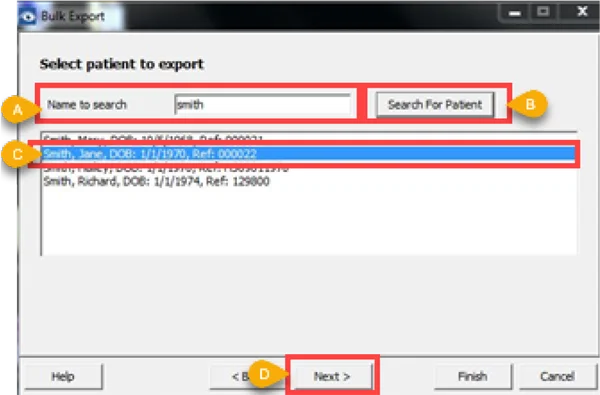
- Locate the Patient to export by typing in the last name in the Name to search (A) field.
- To narrow down the patients in the case of a common name, type the last name followed by a percent (%) sign, then the first name, e.g., Smith%Jane.
- Click Search for Patient (B).
- Select the patient from the list (C) and click Next (D).
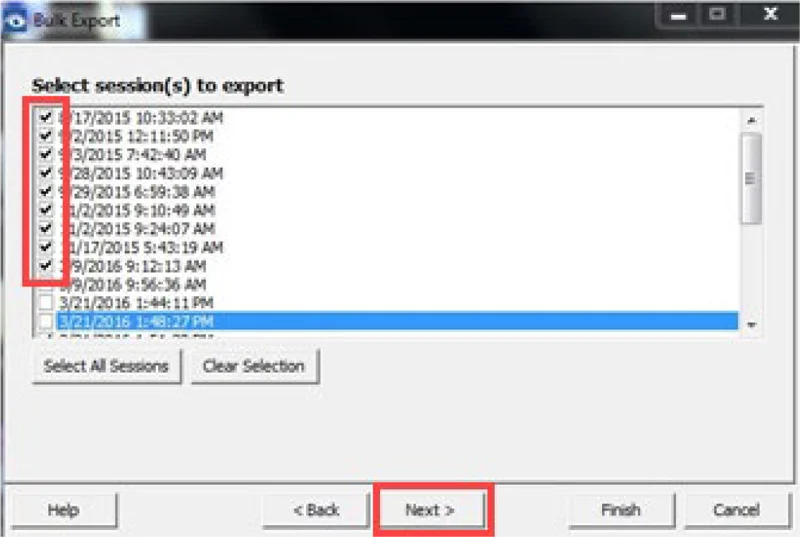
- Select the session dates that you want to export from the list generated by placing a checkmark in the box that precedes it and click Next.
Note: It is recommended that you do not select all the dates at once. Do not import dates already in OptosAdvance.
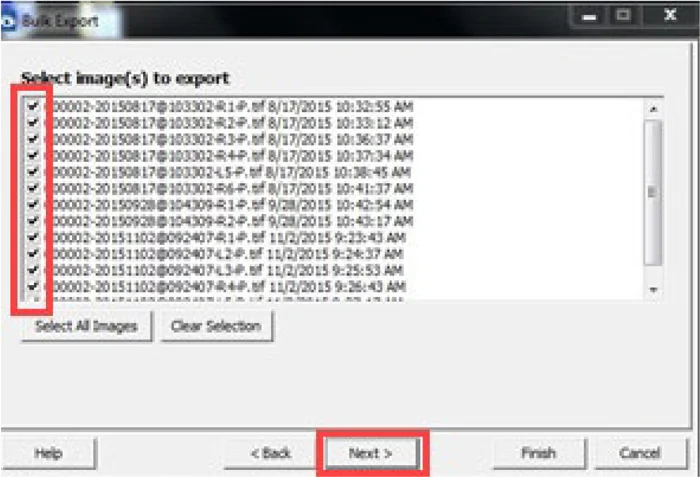
- The next dialog box will show all images from the selected date(s). Select image(s) to export and click Next.
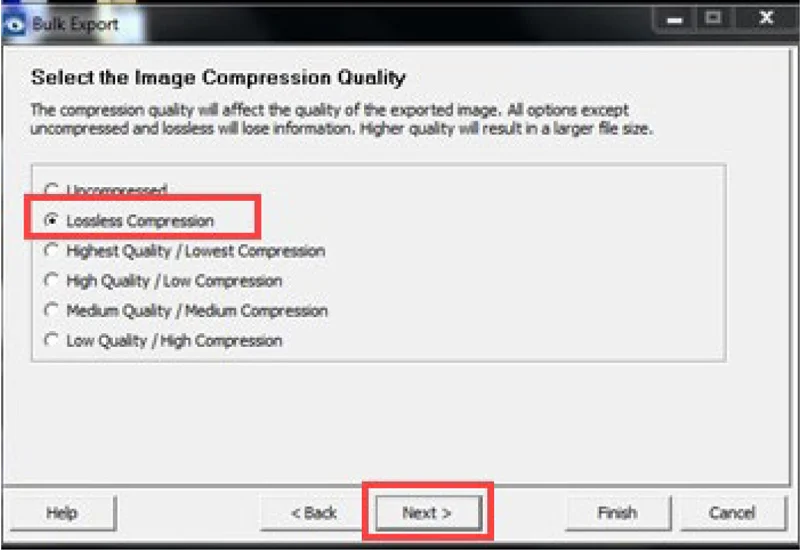
- Select Lossless Compression quality and click Next.
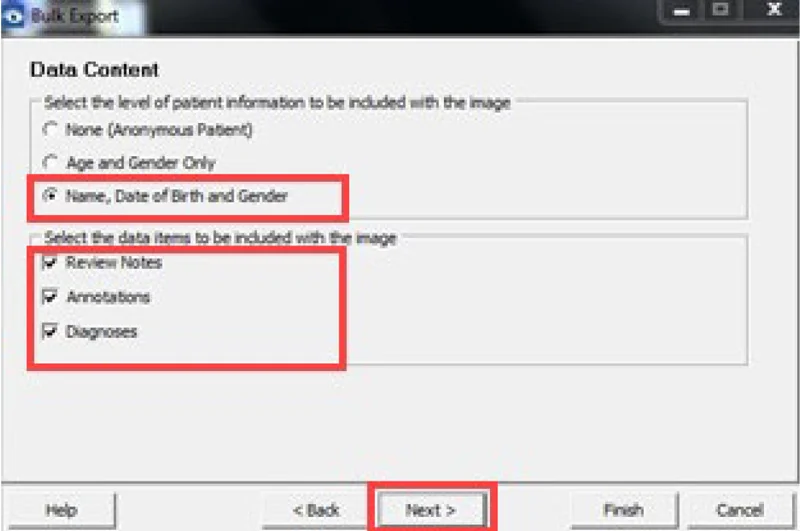
- Select Name, Date of Birth, and Gender as well as notes and other data you would like to export and click Next.
-
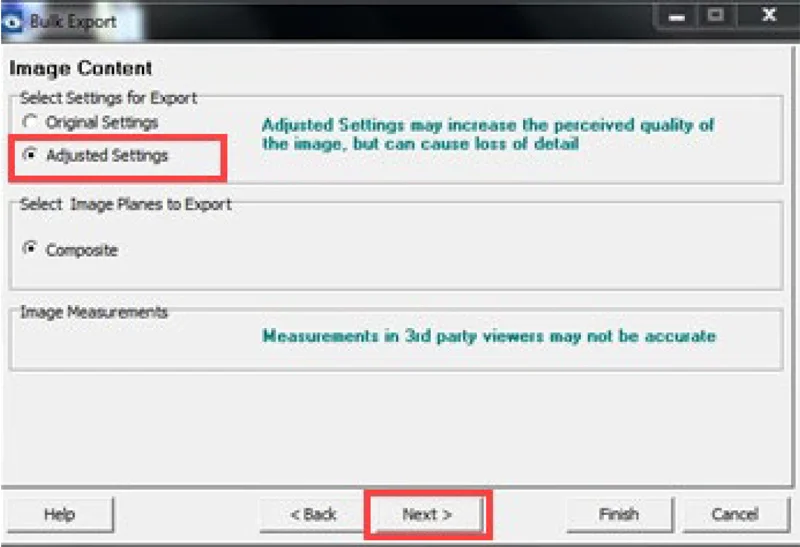
Select Adjusted Settings at Image Content Screen and click Next.
Select Export lower quality secondary image when primary is not available.
- Select Start Export.
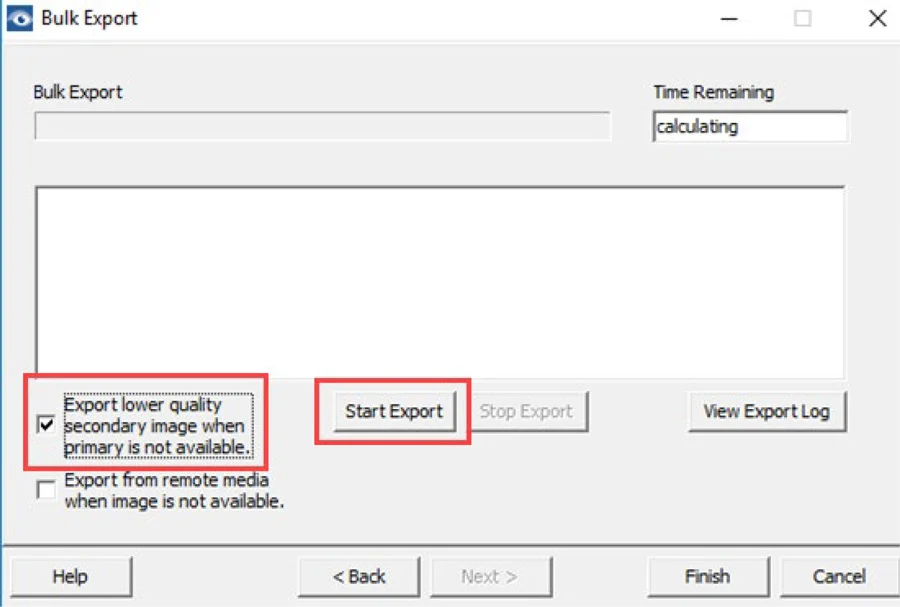
- When completed select the Finish.
Additional Help
If you are looking for further support or have additional inquiries, we encourage you to visit our Contact Us page. Our dedicated support team is readily available to assist you with any questions or concerns you may have.